Home -> Projects -> Cubbies/Router table
Cubbies
Problem
Now that I’ve moved into my apartment I need to find somewhere to store all my stuff. My room is really small, so this requires some creativity. I decided to set up furniture so I could store all my stuff under my bed. Unfortunately, beds with drawers under them are really inefficeint (they waste so much volume!) and it turns out no one sells furniture that tiles nicely under a twin bed. So I decided to make my own.
Inspired by this post on IKEA bed hacks (specifically this bed), I decided to build cubbies to put under my bed. IKEA’s Expedit 2x2 cubbies don’t tile all that well under a bed (plus they’ve been discontinued and you can only find them used on Craigslist), so I decided to make 1x2 cubbies instead with ~1 cubic foot per ~cube cubby.
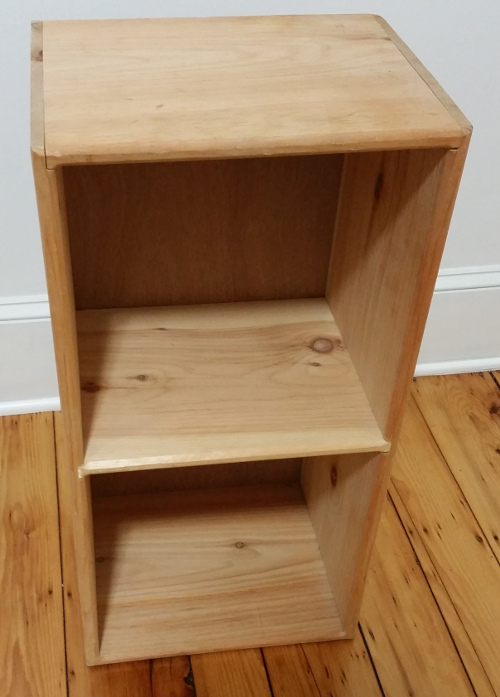
I modeled my cubbies off of this cubby from Rodney’s Bookstore (if it can hold its volume in books it can hold my bed!).
Router table
Note that the cubby I’m modeling off of has slots cut in it. The only way I’m going to make a lot of these cubbies is by using a router table, so step one of this project is to build a router table. There are lots of youtube videos on how to do this, and they all go something along the lines of:
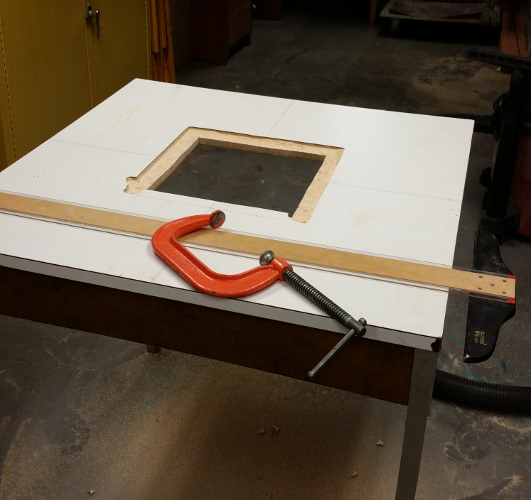
Take a table and cut a hole in the middle to mount your router. You wish you had a router table for this part, but you don’t so you have to do it by hand. (For some reason none of the guides suggest using a friend’s router table or your other router table (“Step one: cut a hole for your new router table using your old router table”)).
Build a plate that you can mount your router to that fits the hole you just made in the table. Mount the router, put it in the table.
Build a fence. Everyone does their fences differently, but pays a lot of attention to keeping all parts of the fence straight/orthogonal. The best setups involve a shop vac mount (on the fence, or even better on the router).
Layout and dimensions
Step one is to find a layout of cubbies under my bed such that there are as many as possible and they are easily accessible. Step two is to tweak the dimension of the cubbies to make the layout work. Step three is to tweak them even more so they can be cut out of 4’x8’ sheets of wood. Step four is to build them.
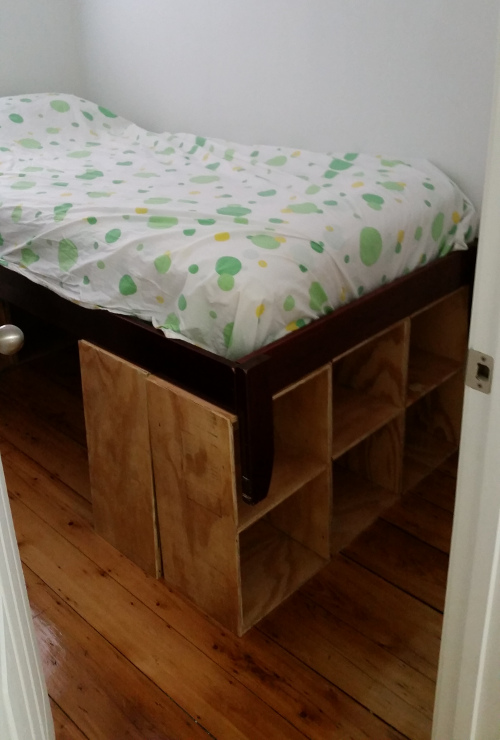
The biggest problem with the IKEA Expedit bed is that the cubbies in the back aren’t easily accessible. Either the bed needs to be placed so neither long edge is next to a wall or the cubbies need to be arranged so that all of them are accessible from one side. I chose the later option. Here is my final layout (top view, arrows point in the direction the cubbies open):
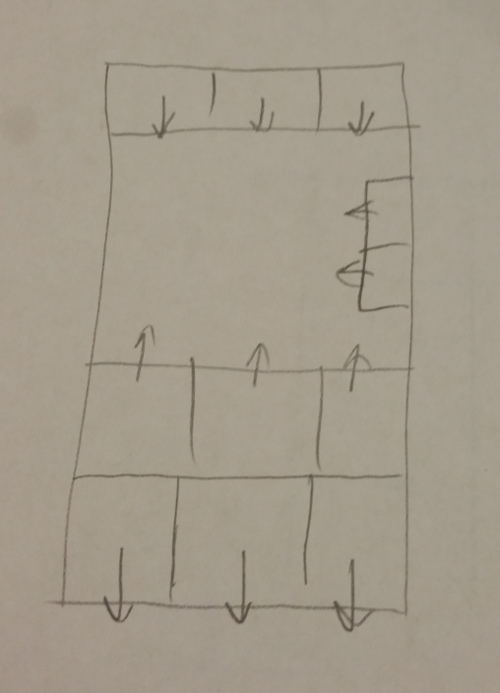
In addition to this arrangemnet I considered the possibility of 4 rows of 3 (1x2) cubbies, one row at each end and two in the middle facing away from each other. This allows for one extra cubby, but requires two isles I can fit in to access the contents of the cubbies –> the cubbies can’t be as deep. My final layout avoids this problem by placing all the cubbies around a single open area.
A twin mattress is 38“x75”. Twin frames are normally a couple inches larger. To fit 3 cubbies across the width of the bed they should have width (38 + a bit)/3 = 13“. This works with my layout with a depth of 12 inches, but it turns out the pieces of the cubbies can be cut more efficiently if the depth is 11” (11" + 13" = 2’, which tiles nicely). The exterior height should also be 2’ for tiling purposes, which means I have to climb onto a bed that’s 2’ + frame thickness + mattress height ~= 3’ off the ground. I’m short so that’s a bit high, but it’s workable. Here’s the layout of the cubby and how it gets cut out of a 2’x2’ square:
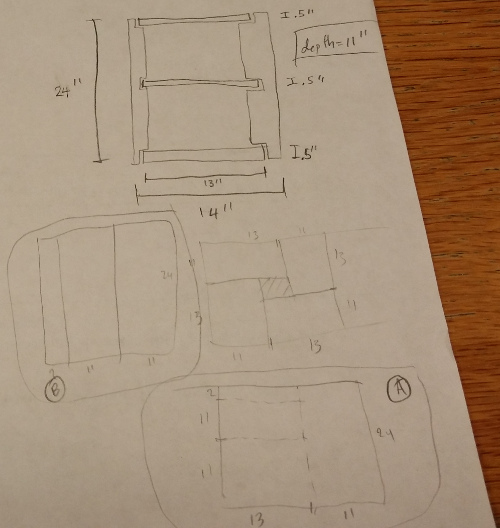
Now for materials. I need 11 cubbies. Each cubby has 3 shelves, for a total of 33 shelves. Layout A produces 2 shelves (B produces 0), so I need at least 17 As. I need 11 * 2 = 22 sides (and now have 17 from the As), so I need at least 3 Bs (2 sides each). That’s a total of 20 2x2 squares. I get 8 2x2 squares per 4x8 sheet, so I need 3 sheets and get 4 extra squares. With 20 As and 4 Bs that’s enough for about 13 and a half cubbies. I found a 4x8 then sheet of … something at Home Depot I could use as a backing (one is enough for 14 cubbies).
Assembly
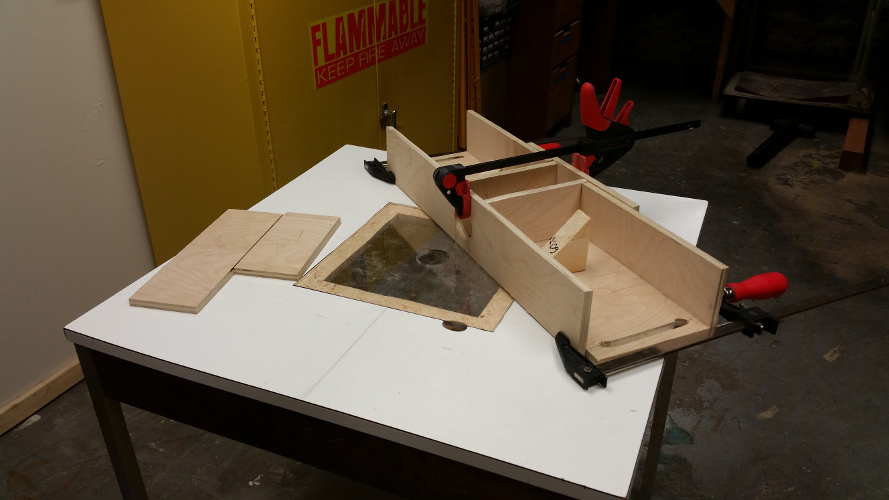
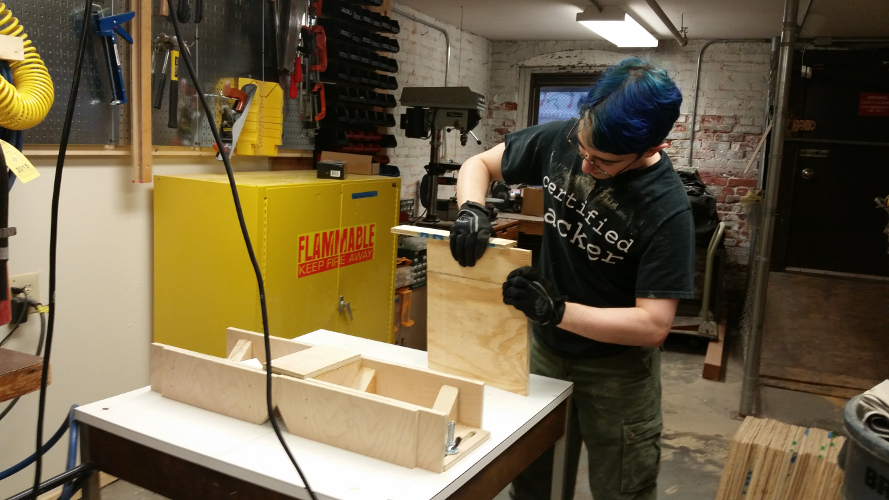
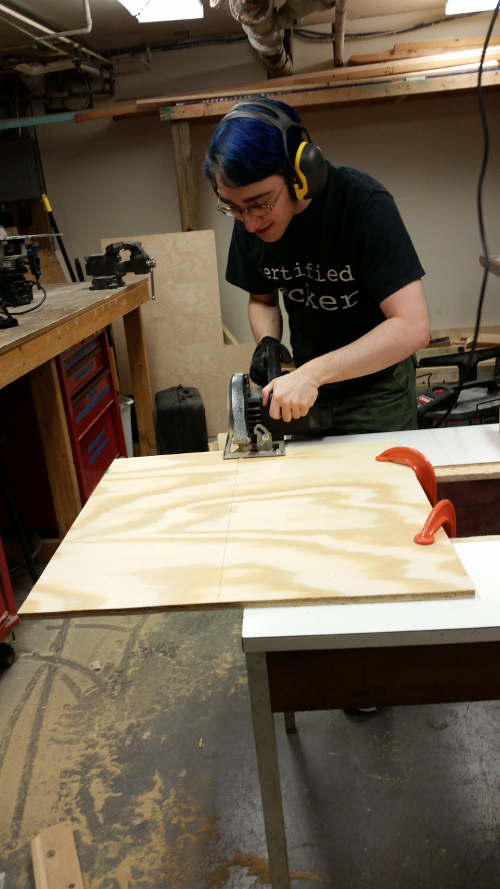
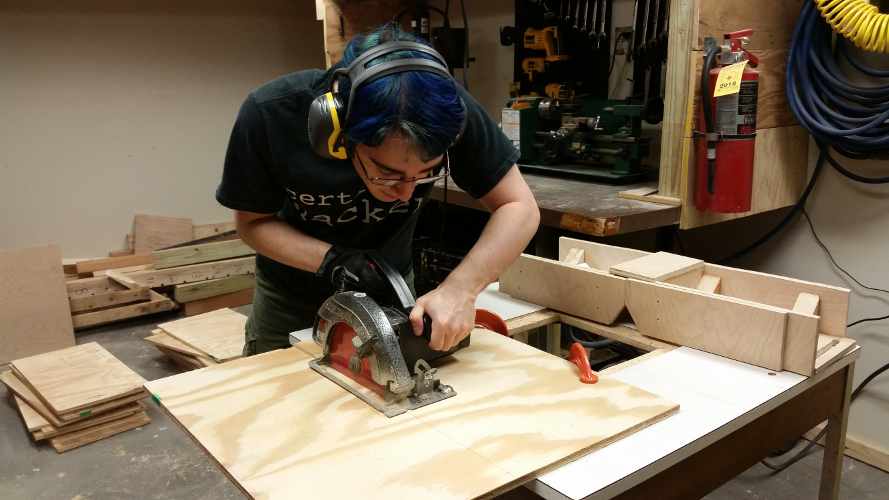
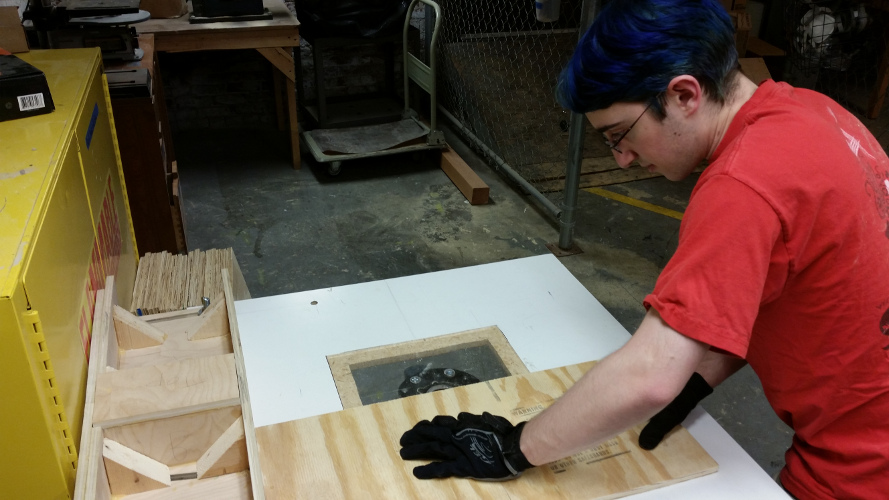
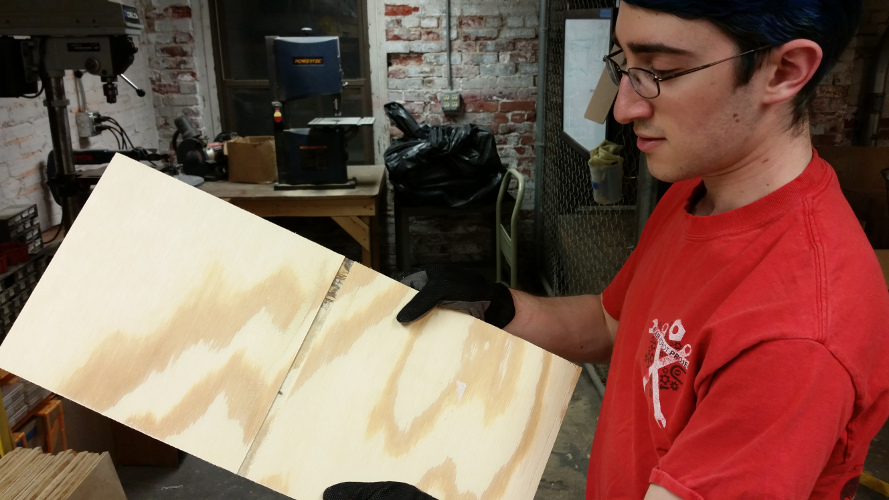
All the planning is done, time to cut. And cut. And cut. I really wish I had a table saw for this part. The router table worked great though, big success there.
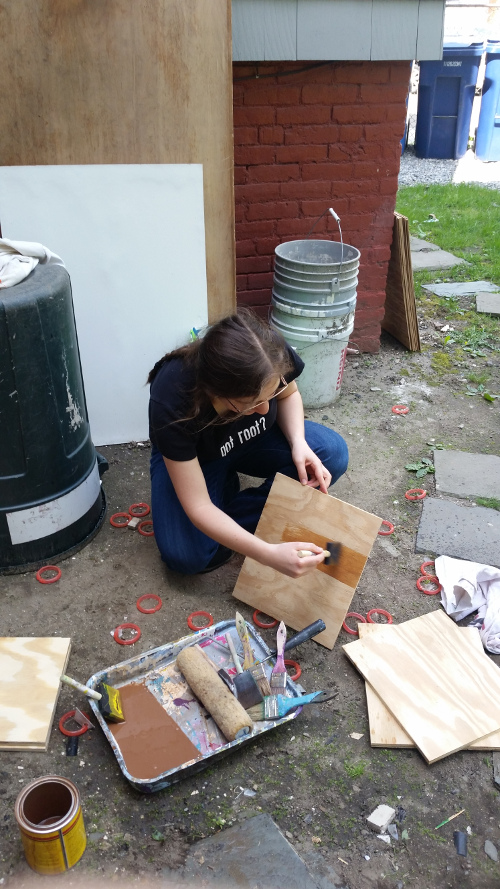
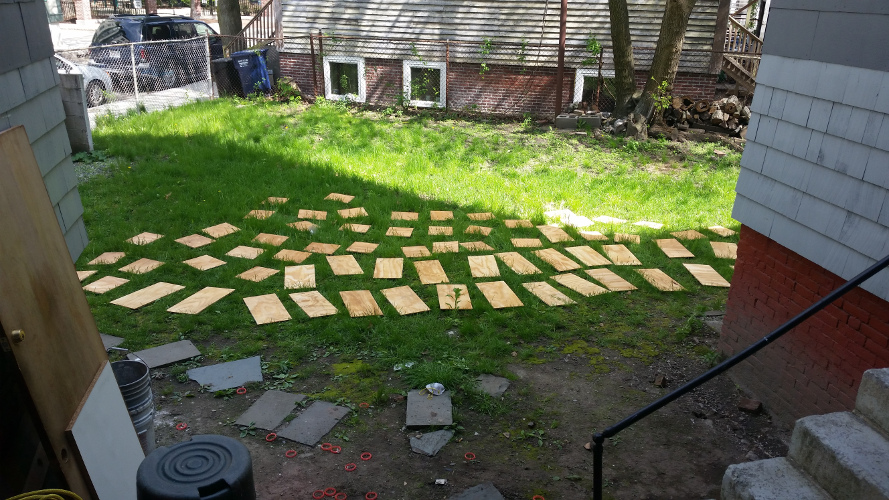
Then time to stain everything. I chose a good shirt to use as a rag to clean up.

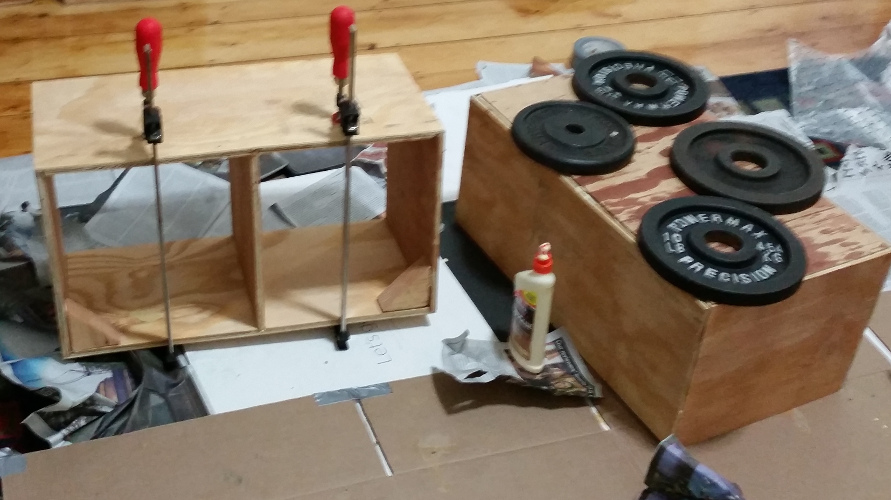
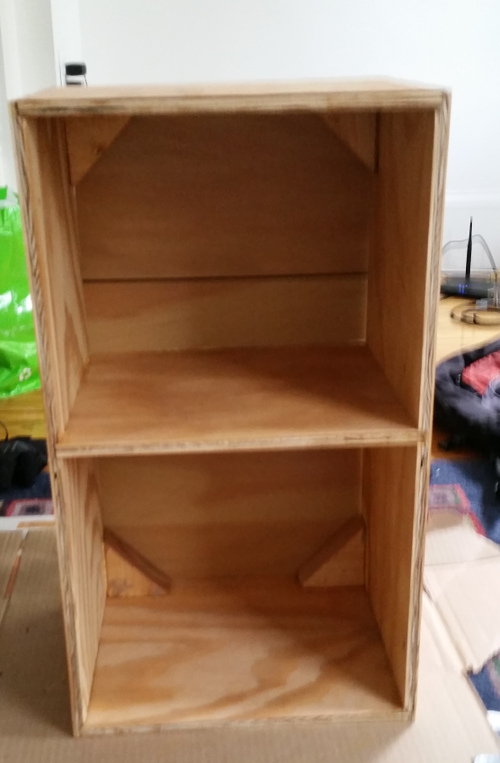
And assemble. By design this just requires wood glue and clamps, although at the last minute I decided to add extra triangle pieces in the corners to ensure that the cubbies don’t tilt.
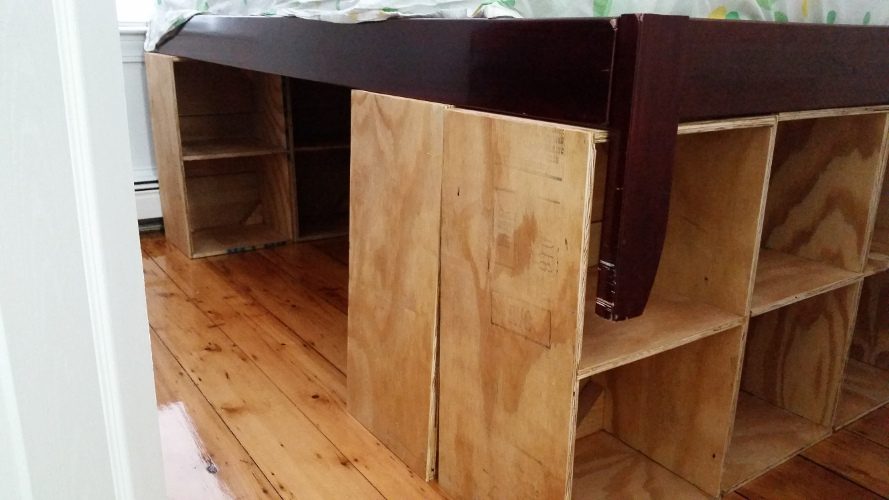
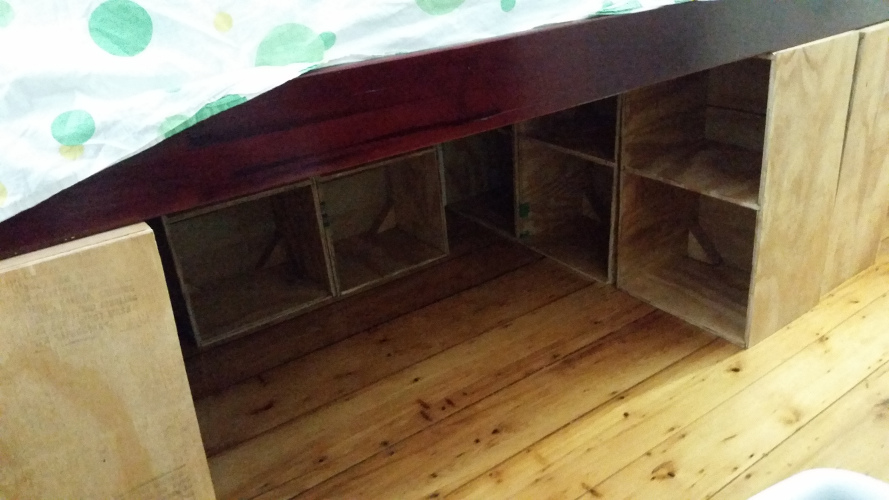
And the final setup.
Acknowledgements
Thanks to Erons, Asya Bergal, Lori Kaufman, and Adam Yedidia for helping me with various parts of this project.