Home -> Projects -> Penguin Sewing Pattern
Penguin Sewing pattern
Remember all that shit I wrote/did in the name of fun and/or making a stuffed pig for my sister? Here we go again!
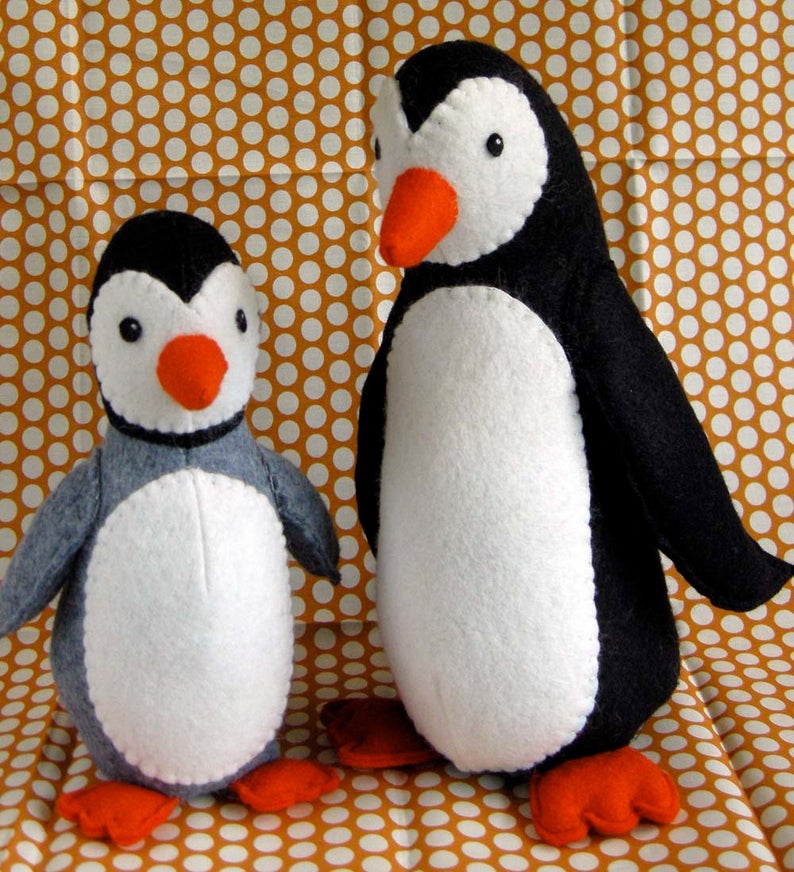
Someone else’s penguin sewing pattern
Once again, I’m browsing cute things on the internet, and this time I come across an adorable penguin sewing pattern. My Mom loves penguins, and I want to make one for her. But I don’t like paying for information, so instead of buying the pattern I decide to make my own and post it for free.
How to make a sewing pattern?
For any of you hunkering down for another never-ending essay on blender, 3D modeling, and UV mapping, don’t worry. I did something simpler this time. Would you know, there are multiple ways to make a sewing pattern? One of these days I’m going to meet someone who makes sewing patterns and they’ll say “no, David, this is not how it’s done.” But I like my methods. And this one was simple and easy and I think it should produce good results for a large fraction of stuffed animals.
Specifically, I decided to model the penguin as a vertical stack of cylinders (changing radius and center). This is a pretty good model for the shape of a penguin, with the exception of the top of the head (which is distinctly a hemisphere, and needs special handling – more on this later).
Cylinders are nice shapes because they have zero Gaussian curvature. This means that you can form a perfect cylinder by rolling a sheet of paper/cloth, which is really convenient, because sewing patterns are sheets of cloth. (In contrast, a sphere has non-zero Gaussian curvature, and it is impossible to make a perfect sphere by folding paper.) Here’s the process:
- Measure the side view of the penguin. At each height (discretized to 1" intervals on an 18" tall penguin) find the start/end coordinates of each part of the penguin (white belly vs black body vs wing).
- Treating those measurements as measurements of a stack of cylinders, compute the sizes and locations of these cylinders.
- From each cylinder determine the length of cloth at that height to unroll the cylinder into a flat sewing pattern.
- Sew!
I like this method better than the blender method because it constructs something 3D using only 2D materials (whereas blender started with a 3D model). It should work well on anything that’s mostly a stack of cylinders (most importantly circular cross sections). This means that you can take all kinds of drawings (yours, or from the internet) and turn them into 3D versions of the same thing!
Measuring
In principle I could have done this digitally, but there’s something wonderfully meditative about using a ruler and a pen, while sitting in a park on a beautiful sunny day, listening to chill music. Jealous? You should be!
I printed the side view of the penguin, scaled to my desired size, and overlaid a grid on it. I used this grid to label all coordinates intersecting horizontal grid lines, as well as important points (i.e. the start of the tummy, the tip of the wing).

Modeling
For each height, I assume I’m looking at the side of a circle. The leftmost and rightmost coordinates give me the diameter and center of the circle. Each other coordinate is an x-coordinate on the circle. With a little math I can compute the length along the circle to that point. This is the length I need to unroll the cylinder into a flat sheet!
I wrote a short python script to do this transformation. In addition to the measured coordinates, I also computed the length along the cylinder to a vertical line (x = 4.5, for the body). This gives me a method for aligning the slices with each other – I should pick an alignment that keeps that reference line vertical.
I mentioned earlier that the sphere would require additional darts not specified by the stack-of-cylinders model. I decided to do this by first sewing it together, then pulling a fold of the fabric inside (however much feels right) and sewing it to itself. I could have been more precise about it, but this worked.
Sewing pattern
The output of the python script is a set of coordinates defining a sewing pattern. Once again I drew them on paper by hand – perhaps not the best for sharing, but very meditative. I took a picture with a ruler in it for scale in case you want to print your own copy.
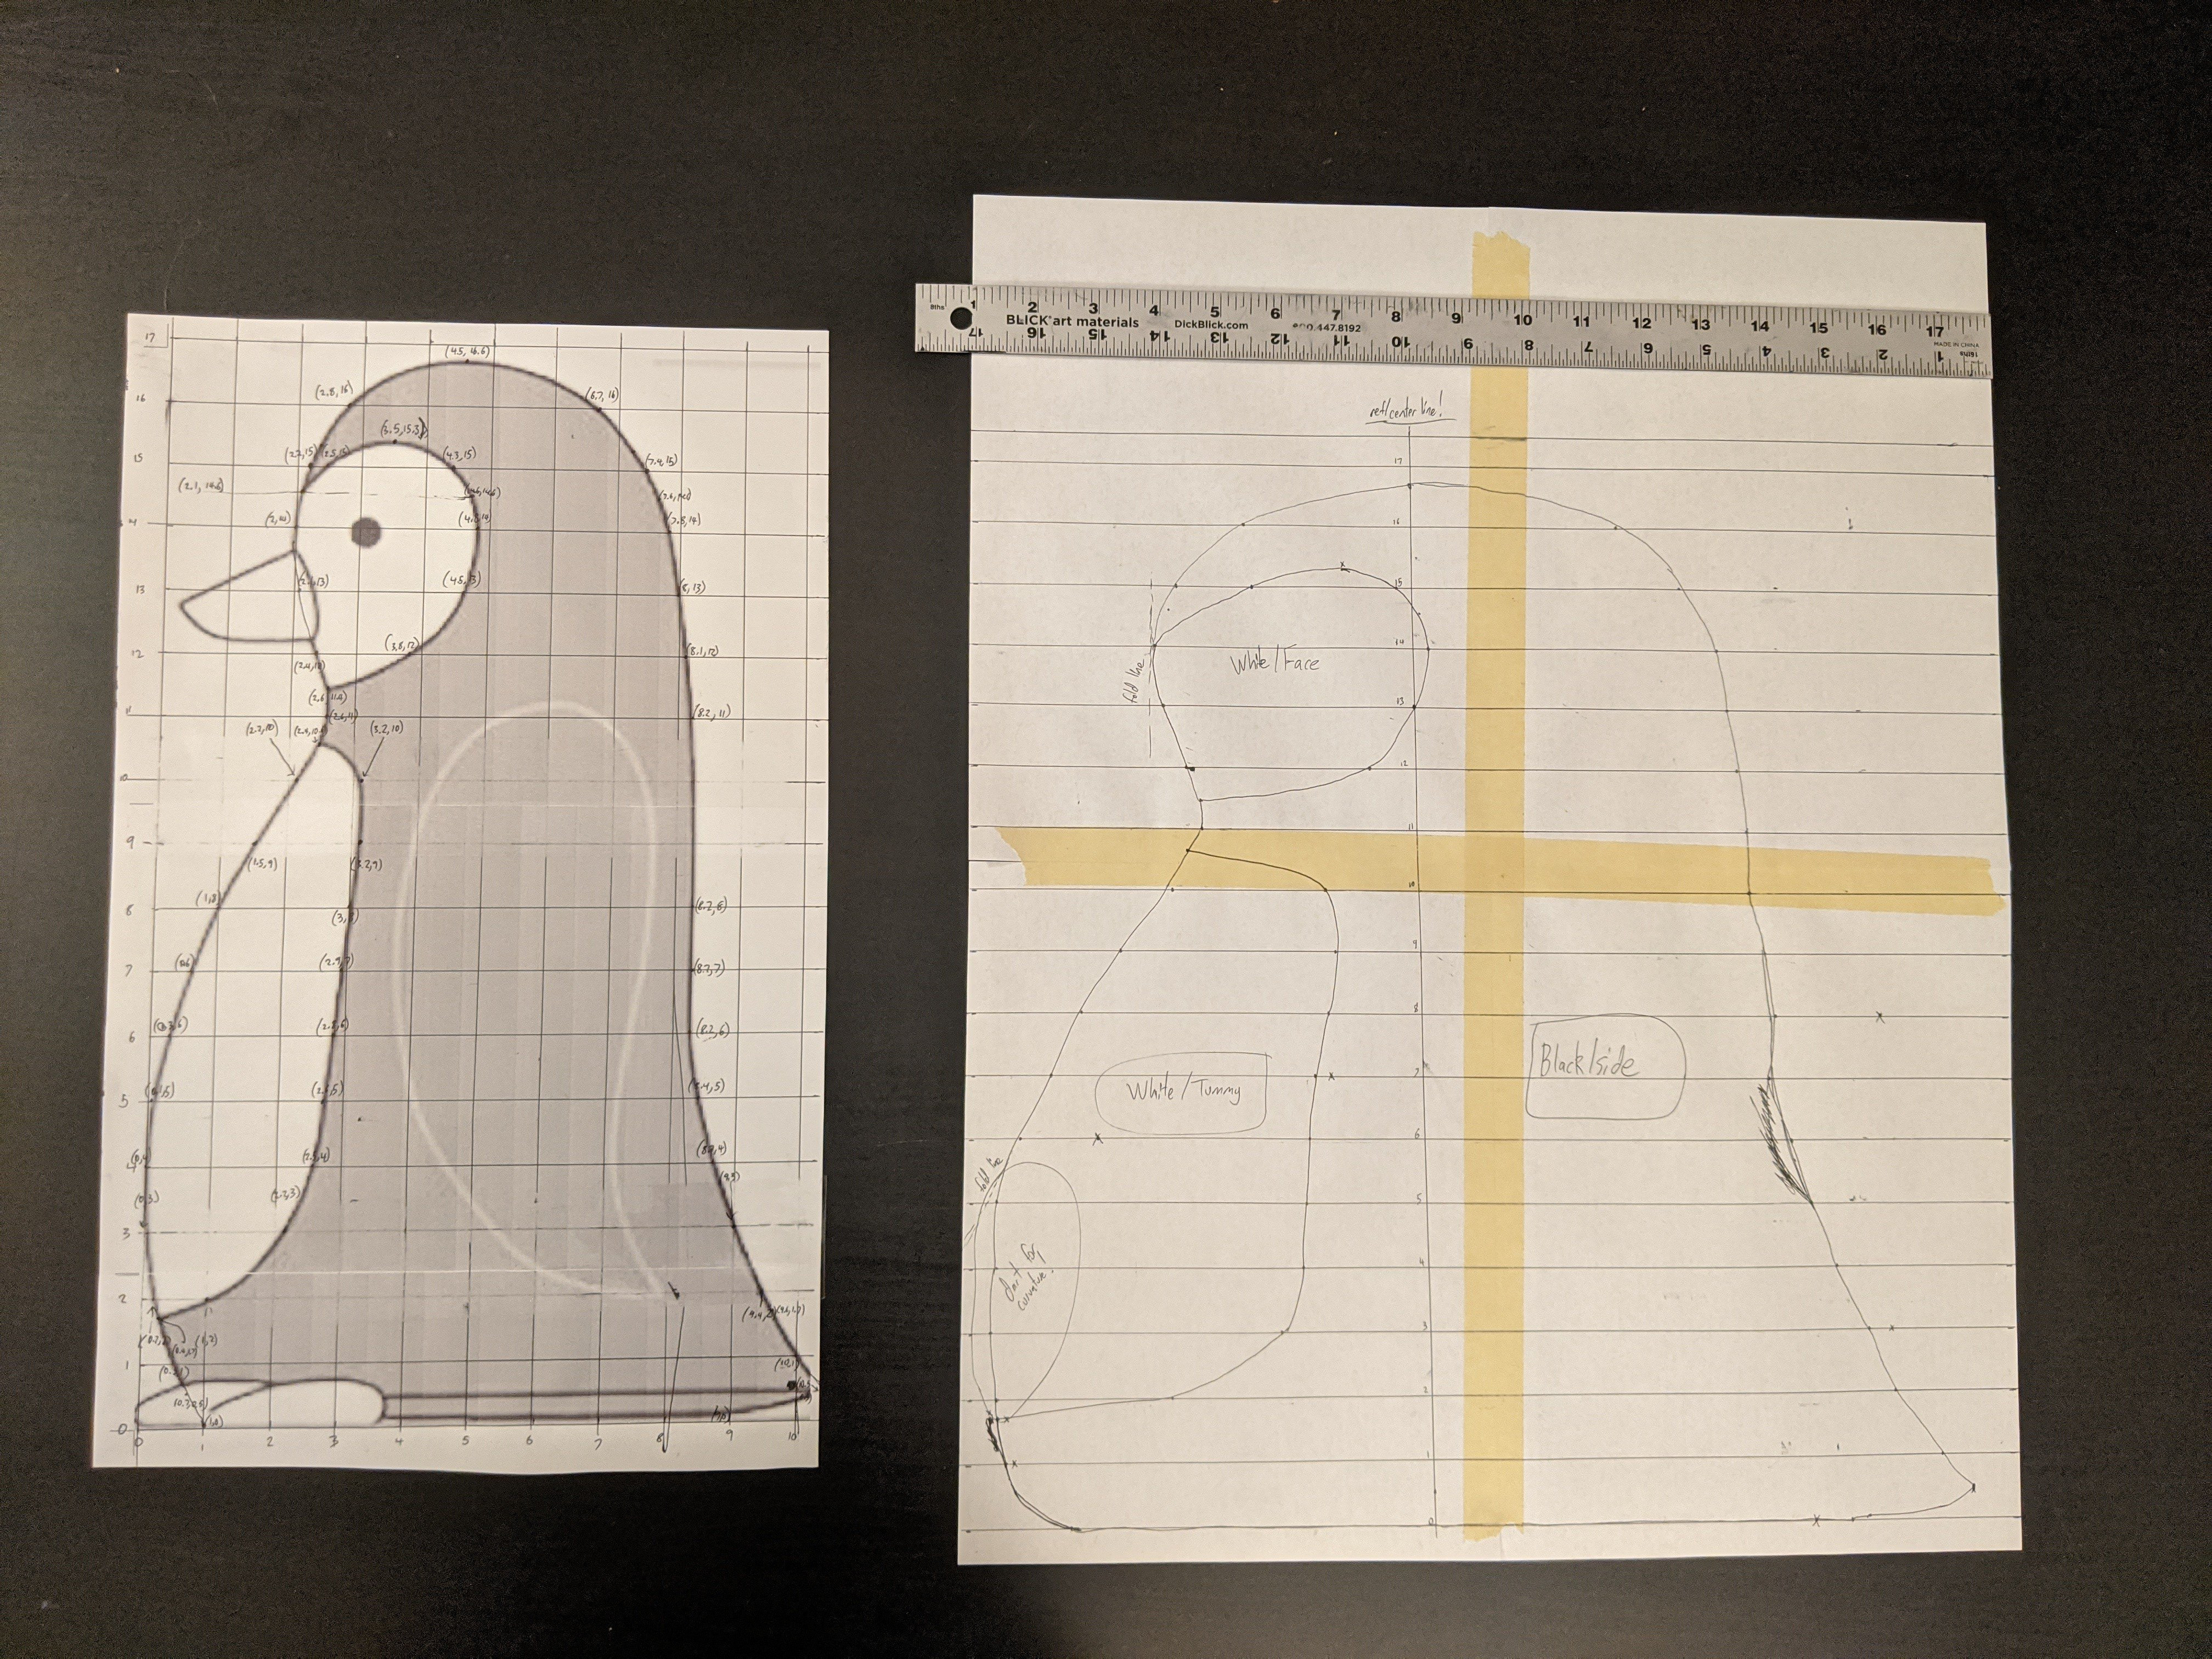
For comparison, see the side view next to the unrolled sewing pattern. The sewing pattern looks distorted (specifically by arccos() at each height!). The belly (more generally, any feature on the front/back of the penguin) is much bigger in the unrolled view. Aren’t transformations cool? Maybe I’m the only one who thinks they’re cool, but yes. They’re cool.
If you look carefully at the sewing pattern, you’ll see that I smoothed out a few zigzags instead of strictly following the points from the model. Why? It’s just a model; it’s an approximation! It’s a guideline, not a rule. If I don’t want a wiggle in the penguin’s back, then I should remove that wiggle from the pattern. (Actually it probably doesn’t matter because the precision of this pattern is much greater than my cutting and sewing precision and the wiggle is small, but even so…)
Results


An adorable, chubby penguin, and a great size for hugging. Now to figure out how I’m getting it to my Mom…